EasyBadge: Barcodes & Encoding
By James Kelly on February 3rd, 2020
EasyBadge software allows you to add barcodes to your ID card design. This article explains how to do it.
1. Open up your card design by clicking the “Change a Design” button, you will then get the option to edit an existing design or create a new design. Select the appropriate option.

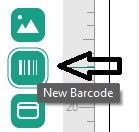
2. In the design view, click the “New Barcode” option and drag and drop the Barcode on to the design.
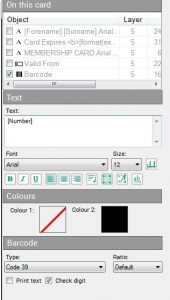
3. In the properties area on the left, you can now set the properties of the barcode.
In the “Text” area, this example shows [Number] so you’d need to have a field in your database called ‘Number’ with some data in it. This links the data in the database to the barcode on the design.
At the bottom of the barcode properties, you can select the barcode type you require. This barcode in this example is set to Code 39 – a popular barcode.

Please note, if you do not have data to link to you can also use [SerialNumber] instead of linking to an existing number field.
On the menu in Card Designer click the options button (3 lines) and select “Serial Number” to edit the parameters of the Serial number which will automatically increment every time a card is printed. This way you can just create barcodes without the need to set up a database.
EasyBadge software allows you to generate QR codes for your card design. In this article, we’ll explain how to add and manage them.
1. Open up your Card Design by Clicking the Change a Design button, you will then get the option to Edit an Existing design or Create a new design. Select the appropriate option.

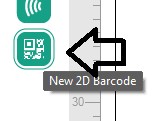
2. In the design view Click the New 2D Barcode option and drag and drop the Barcode onto the design. You can right click this icon to change the type of 2D barcode.
3. In the properties area on the right-hand panel you can not set the properties of the 2D barcode. In the “Contents” area this example shows [QRCode] so you would need to have a field in your database called ‘QRCode’ with some data in it.
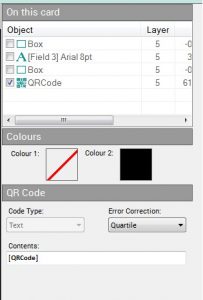
This links the data in the database to the barcode on the design. At the bottom of the barcode properties, you can select the barcode type you require.
If you want to use Mifare encoded fields with EasyBadge, it’s necessary to add a specific field. These instructions lay out what you need to do.
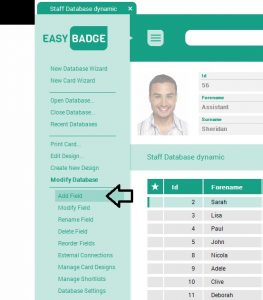
1.When in your database click the menu button in the top left of the EasyBadge Program window.

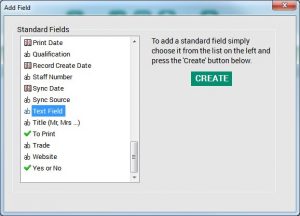
2. Click Modify Database > Add Field.
3. Select “Text Field” and click the “Create” button.
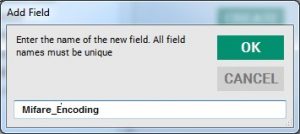
4. Name field as ‘Mifare_Encoding’ and Click ‘OK’.
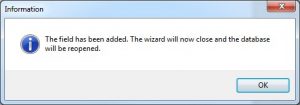
5. Your Database will need to close and re-open, click ‘OK’.
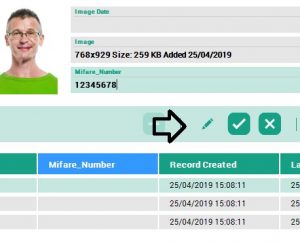
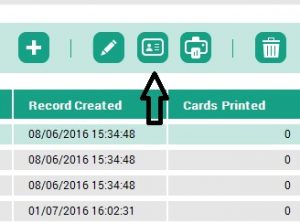
6. Click the pencil on the central tool bar to add some encoding data to the new Mifare_Encoding field. Make sure the data will fit on a Mifare sector. Click the ‘Tick’ Icon to update the record.
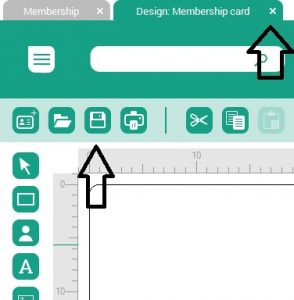
7. Now we need to edit the design. Click ‘Change the Design’ Button.
8. From this menu you can edit a design by bullet pointing the design you want to change and click Edit a Design icon.

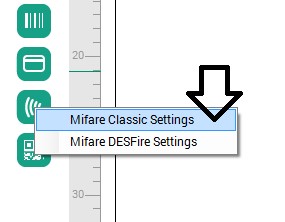
9. Click the Contactless icon on the left tool bar and select ‘Mifare Classic Settings’ to bring up the settings for this template.
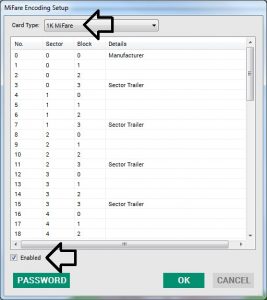
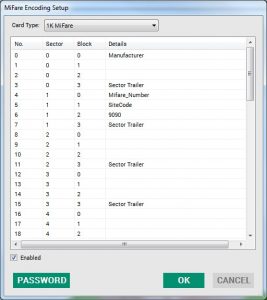
10. Make sure the correct card type is selected for your cards, the choices are Mifare 1K, 4K and Mifare Ultralight EV1 cards. Also click enable at the bottom to active encoding.
11. Double click one of the sector blocks (usually block 0) to add the data string that links the data. In the below example we have added the link to the Mifare_Number field. Click OK to close the block.
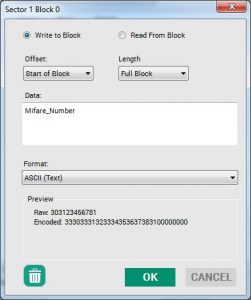
12. In the below image we have added Mifare_Number field link to Sector 1 block 0, SiteCode field link to Sector 1 block 1 and a static number to Sector 1 block 2. Your encoding details will be bespoke to your requirement.
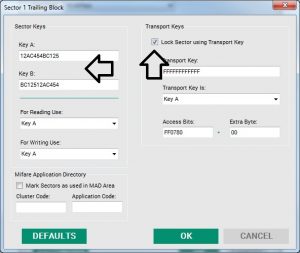
13. Now double click the Sector Trailer of Sector 1. We can apply new keys to the sector by putting a new 12 digit Hex key values (0-9,A-F) overwriting the default Key A and B value FF FF FF FF FF FF. We also need to tick ‘Lock Sector using Transport Key’. This will lock the sector.
14. Now close the Mifare encoding dialogue boxes by clicking OK on each box, save and close the design.
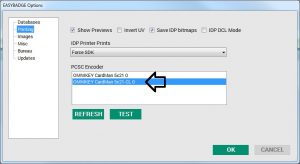
15. Finally, check that the contactless encoder (CL = contactless) is selected in the Printing menu under settings from the main menu button. (On the IDP Smart 70 the Duali encoder will not appear in here.)
You should now be ready to print cards and do Mifare encoding on a sector that has locked keys applied to the sector. You can check the card encoding through EasyBadge too, by following the steps listed below.
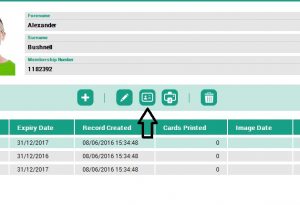
1. Place the encoded card near the contactless encoder in your printer or use the printer tools (usually found in the printer properties of the driver) to move the card to the encoder position.
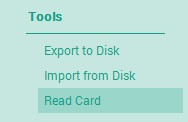
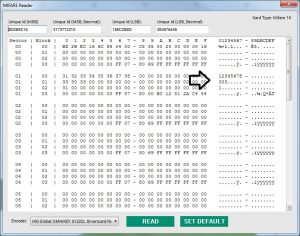
2. Now In the card designer click the main menu button (3 lines top left) and select Tools > Read Card. A window will appear showing the details of the encoded card. EasyBadge uses the Key A and B in the card design to inspect the card.
If you need help encoding your magnetic stripe cards using EasyBadge software, you’re in the right place. The following steps guide you through the process.
1. Open up your Card Design by Clicking the Change a Design button, you will then get the option to Edit an Existing design or Create a new design. Select the appropriate option.
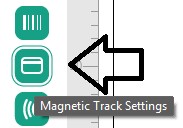
2. In the design view, click the Magnetic Track Settings button.
3. In the properties area of the magnetic track encoding settings enter the field name in your database that contains the data that needs to be encoded.
In the example below the field with the magnetic data is called “Staff Number” and there is a suffix of “01” which is also encoded. You can change the string to meet your requirements if you need a different prefix or a suffix.
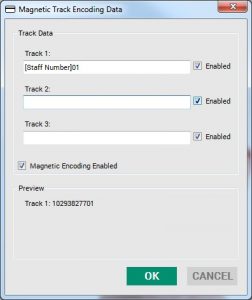
Click OK to confirm the setting changes. EasyBadge will now encode the data you have specified onto the card provided your make and model of printer is supported and it has a magnetic encoder and you are using magnetic stripe cards.
If you need to turn off the check digit function in EasyBadge, you need to carry out the following steps.
1. Open up your Card Design by Clicking the Change a Design button, you will then get the option to edit the existing designs. Tick the box with the design with the barcode on it and click Edit a design to edit it.

2. In the card design view, click the barcode to select it.
3. In the properties area on the right, you can now set the properties of the barcode. At the bottom of the barcode properties, you can deselect the check digit tick box. This should stop the check digit from reading as part of the barcode.
4. Complete the process by saving the changes to the design by clicking on the save disc on the toolbar. The check digit of the barcode will now be switched off.
Prefer to Talk?
Our team have more than 25 years of industry knowledge and are happy to help. We're available Monday to Friday, from 9am to 5pm.