EasyBadge: Using the Database
By James Kelly on February 6th, 2020
You can set up default databases for multiple users in EasyBadge. Before you start however, the data you’ll be using is collated using ‘Regedit’ so it’s important that you’re familiar with this Windows tool before beginning. You can set up a default database for multiple users by following the steps below.
1. Open EasyBadge on the first user account and open your database.
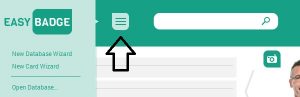
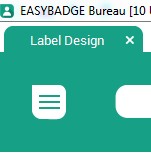
2. Click on the menu button. This is the switch with three lines in the top left corner.

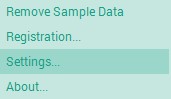
3. Select settings. This is towards the bottom of the drop-down menu button.
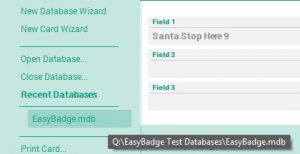
4. On the database tab, click on the name of your database and then click the ‘Auto’ open button. This will set the current database as the default databases and the information will be writen into the registry.
5. In the ‘Run Command’ line in Windows, run ‘Regedit’ to open the Registery Editor and select ‘EasyBadge General Entry’ in the following path:
- HKEY_CURRENT_USER > Software > Digital ID > EasyBadge > General
6. Any value recorded in General can be added to the EBDefaults.txt file, and used as a default value when you have multiple users. The below example text from the EBDefaults.txt has the license information and the default database included which is useful if you have multiple users on one computer.
- General.RegName=EasyBadge Support Team
- General.RegAuth=12AB54EF
- General.DefaultDatabase=Provider=Microsoft.Jet.OLEDB.4.0; Data Source=Q:\EasyBadge Test Databases\EasyBadge.mdb;User Id=Admin; Password=;
7. The EBDefaults.txt needs to be copied into this location:
- C:\Program Files (x86)\EasyBadge
From this point, EasyBadge will use the information in the EBDefaults file if the values are not found in the registry.
If you need to connect to a non-EasyBadge database, you’ll need to first create a custom database in EasyBadge and save it as a ‘SQL db’. For this guide, we’ll assume you have credentials with access to the server platform you need to connect to, along with access to the relevant databases.
The steps below will help you create a custom database when the Wizard doesn’t include fields that are required. If you’re undertaking a larger print project, it’ll be necessary to create a custom database with more specific fields.
The print project may have specific requirements that need to be met, or you might need to link to a larger parent database. You can do this with a combination of using the database Wizard and adding fields manually.
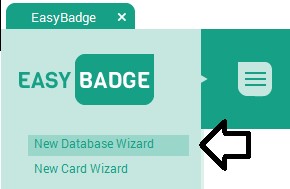
1. Click the menu button in the top left of the EasyBadge program window.

2. Click ‘New Database Wizard’ to start a completely new database.
3. Click the ‘Create’ button.

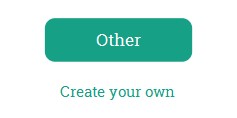
4. From there, click ‘Other’ > ‘Next’ to start a new template.
5. on the ‘What information do you want to record’ page, add in the required fields by clicking the buttons on the right. You can type custom field names and click + to add them if required. These are all text or date fields, but you’ll be able to ad more specialist fields later if you require.
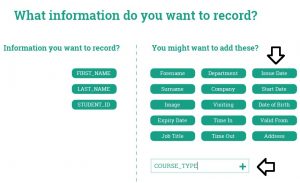
6. This is also the part of the wizard where you choose the fields you want displayed on your card design and which you simply want to be in the database and not displayed.

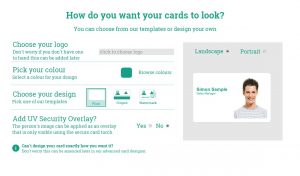
7. Next, the wizard lets you set guidelines for your card design. You can pick how you want it to look, but remember that you can always edit this again later if you already have an agreed design you need to replicate.
8. The last page of the wizard will present you with the ‘Save’ options. In the bottom right corner of the window you an select ‘More Save options’. This allows you to pick the kind of database you want EasyBadge to be. Click the type you want and click the ‘OK’ button.
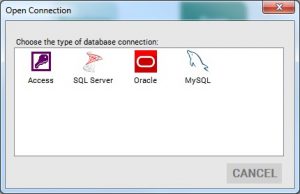
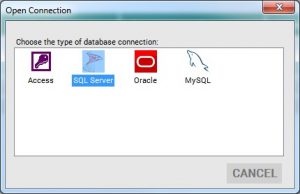
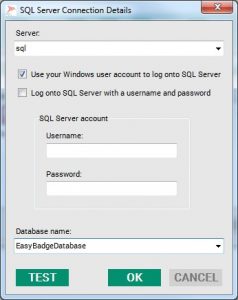
9. Depending on the database type you select, you’ll be presented with a credentials page where you connect to your server of choice. The example in the picture below shows an SQL server.
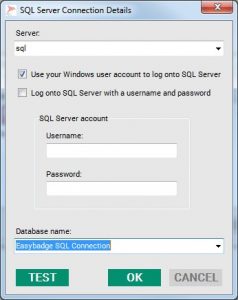
Enter the details and click’OK’ to connect. You’ll then be presented with the main EasyBadge Program window with a few sample records.
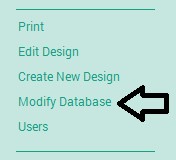
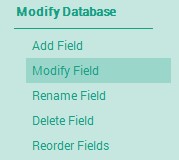
10. Once you’ve saved your database, you can begin to add any other fields you may need. From the main EasyBadge window, click the menu button and go to ‘Modify Database’ to add fields.
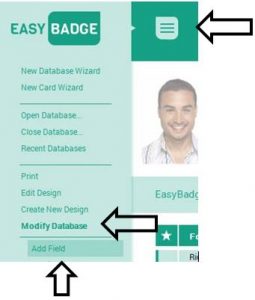
11. This will then bring up a new list with all the fields you can add into your database. Some of these won’t have been available in the wizard example earlier. Once you’ve picked the fields you want to create, click ‘Create’ and then type in the associated field names and specify how many characters you wish to fit in your field.
This will then update your database and you’ll have your fields. Once you click ‘OK’, each field will be added.
12. The above should provide you with the knowledge to create your custom database, but it’s worth bearing in mind you can modify your fields further if required. Some examples include:
- “required to print” – the card won’t print unless it has been completed
- “Hidden” – the field will be hidden from view
- “Values” – adds values so you don’t have to retype long fields such as job titles
If you need to add a field to your cards that do not appear on the default application, you can do it manually. The instructions below guide you through the process of adding a field to your EasyBadge database.
1. Click the main menu button at the top left of the program screen.
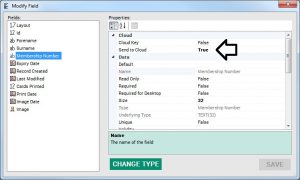
2. Scroll to ‘Modify Database’ and select ‘Modify Field’.
3. Make sure ‘Send to Cloud’ is set to ‘True’. Now click the ‘Save’ button.
4. A few minutes later, the new settings will be uploaded to the cloud and the field should appear in the app.
The steps below outline the process of moving your EasyBadge database to a different location.
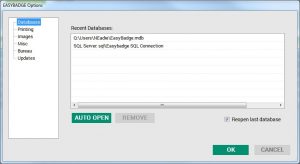
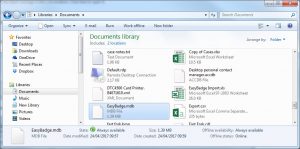
1. Make sure you’re able to browse the location of any database file (.mdb) that you need to move. You’ll be able to see these by navigating to ‘Settings’ > ‘Databases’ via the main EasyBadge menu.
2. Now you can browse to this location in Windows file Explorer and move the .mdb file you want to relocate to your desired folder or server location.

3. Next, open up the database from the new location and click the EasyBadge menu button and select ‘Open Database’. From here select ‘Access’ as the type.
4. Browse to where the database file has been moved to and highlight the file. Click ‘Open’ to open it and start using the database.
When you use EasyBadge, the software will create a database on your computer. You can view the location of any database files by carrying out the following steps. If you wish to delete a database, you can do this via windows file browser.
1.Click the main EasyBadge menu button in the top left of the screen.
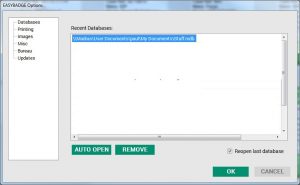
2. At the bottom of the menu, click ‘Settings’.
3. You can then see the location of any databases that have been opened in EasyBadge.
If you want to remove a database, you need to go to the file via a windows file browser, right-click and select ‘Delete’ to erase a database.
You can create a new database on a SQL server by carrying out the following steps.
1. Click the EasyBadge menu button in the top left of the program window.
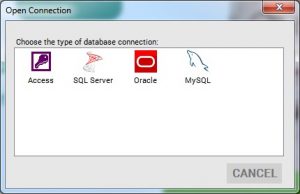
2. Look down the menu list and select ‘Tools’ then ‘Save As’. At this point, you’ll be prompted for the type of database you want. Pick ‘SQL Server’ as the image shows below.
3. Once you’ve clicked ‘OK’, you can then enter the SQL server via a dropdown and save an SQL instance on the SQL server.
The new SQL database will be blank, so you’ll need to import the old data separately. You can find help on importing here, but for quick reference:
- Go to the menu button and select ‘Import / Export’ following by ‘Import from Database’.
- Select ‘Access Database’.
- The table setting on the first import window will default to ‘ImageBase’ which is the correct table. Click’Next’ through the import until it is imported.
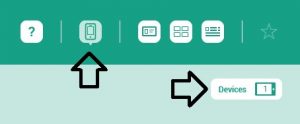
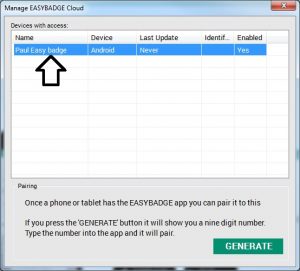
To remove a paired device from EasyBadge software, follow the steps outlined below.
1. Click the phone icon on the toolbar, followed by the devices list button.
2. Double-click the name of the device you wish to remove.
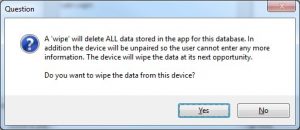
3. Untick the ‘Enable’ button and if required, click the ‘Wipe’ button. This will remotely remove data from the phone app too.
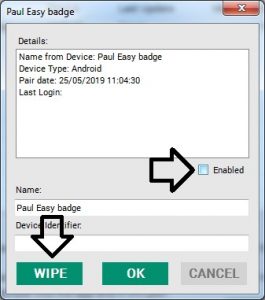
4. Click ‘Yes’ to confirm the data wipe.
The below steps explain how to back up data you’ve created in your EasyBadge program.
1.Make sure you’re able to browse to the location of any database (.mdb) files that EasyBadge needs to back up or rename. Click into the EasyBadge menu (three white lines in the top left program window) and go to ‘Settings’ and select ‘Databases’.

2. Now you can browse this location in Windows file Explorer and make a backup copy of the .mdb file. It’s also possible to rename it by clicking on the file and selecting ‘Rename’.

Please note, if you’re using the smartphone app to send data to the database and you make a copy of files, the data will be downloaded to the database along with the copy.
Pushing data to the cloud enables a database to appear on the mobile application. Follow the steps outlined below to push data to the cloud.
1.Click the EasyBadge menu button.

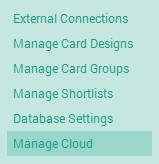
2. Click ‘Modify Database’.
3. Click ‘Manage Cloud’.
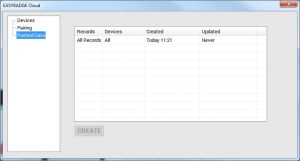
4. In the EasyBadge Cloud settings, select ‘Pushed Data’ on the left and then click ‘Create’.

Now set the settings for ‘App users can add records’ and choose which devices to send data to if there are multiple devices connected. Once this is set correctly, click ‘OK’.
5. Now the pushed data will show all records have been pushed. The data will periodically update to the app each time the database is edited.
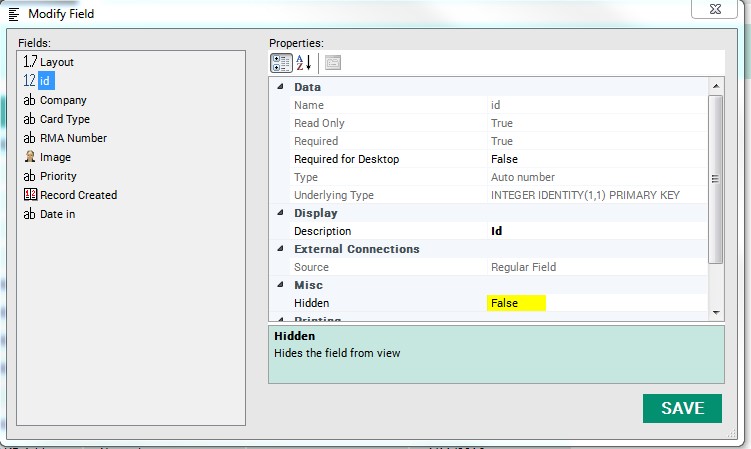
Sometimes, you need to make the unique ID field visible when you’re working on a database. This is usually necessary to you can establish the order in which it was created.
The following instructions guide you through the process of making it visible.
1. Click into the main EasyBadge menu in the top left of the program window.
2. Click ‘Modify Database’, and then click into ‘Modify Field’.
3. Click the ‘ID’ field on the left, and then in the right-hand table set ‘Hidden’ to ‘False’. You can now click ‘Save’ and exit the modify field window.
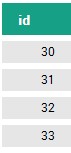
4. You will now be able to see the unique ID field. Click on the header of the field to set the ID numbers back to their original order.
You can export card designs from your EasyBadge database should you need to. We’ve outlined the process in depth below.
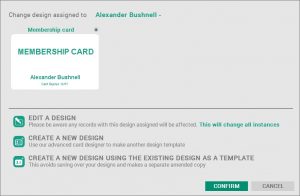
1.Click the ‘Change the Design’ button.
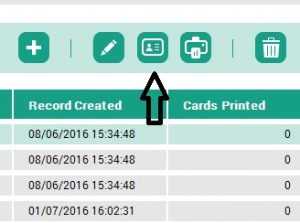
2. From this menu, you can select the design you wish to export. Once you’ve selected the correct design, click the ‘Edit a Design’ icon.
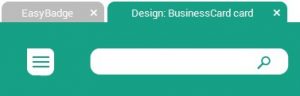
3. From the design window, click the menu icon in the top left corner of the program.
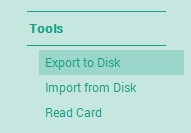
4. From this menu, select ‘Tool’ and click ‘Export to Disk’. It’s worth noting at this point you can also import previously exported designs back into EasyBadge from this menu.
5. You’ll now get a ‘Save As’ window, where you can save the card design on a place in your computer or on an external storage device.
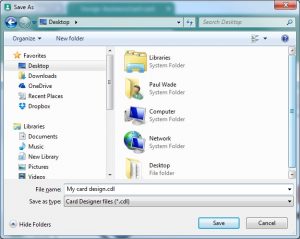
You now have the CDL file (card design layout) on your computer and can email it for inspection or import it into another database.
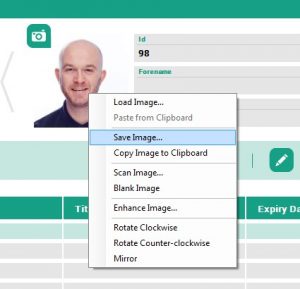
While there’s no bulk image export feature in EasyBadge, it is possible to save photocard images onto your computer. In the card design window, simply right-click and select ‘Save Image’. This allows you to save the image onto your computer or an external storage device.
EasyBadge does have an ‘Image on Disk’ feature which allows you to reference images in a folder rather than loading them directly into the database table.
Prefer to Talk?
Our team have more than 25 years of industry knowledge and are happy to help. We're available Monday to Friday, from 9am to 5pm.